Creating An Activity Note
- Click "+ADD" icon in the right-hand corner of the activity note section
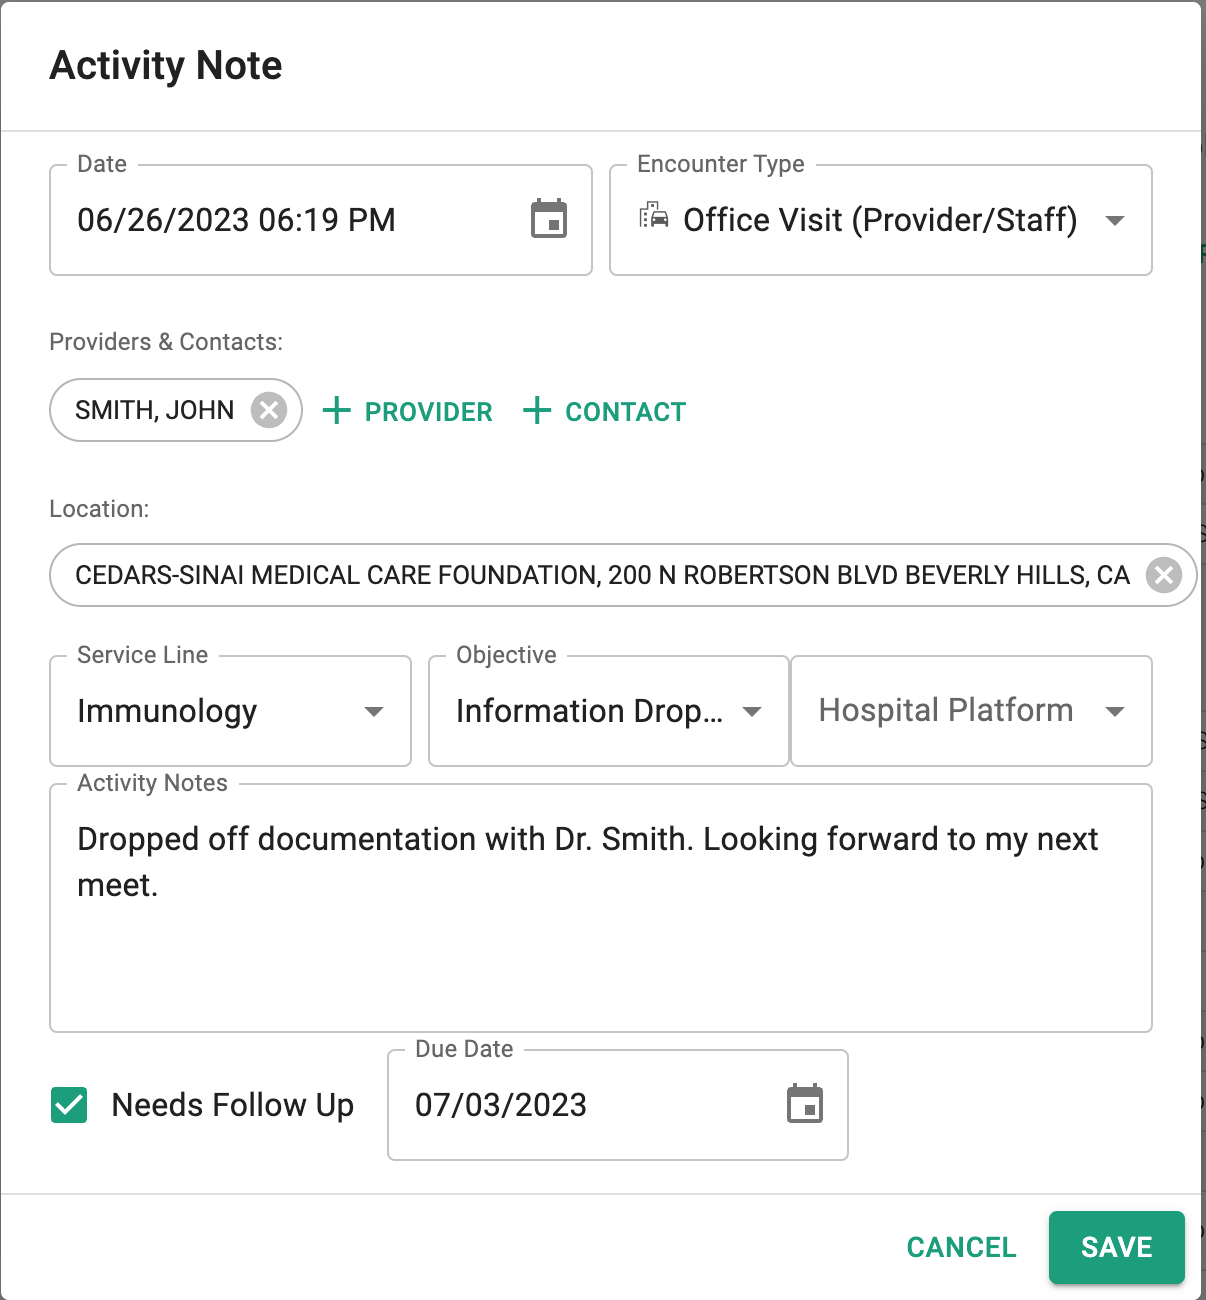
- An activity note screen will appear for users to make their selections and create the note
- Selecting dropdown selections described above
- Users can add multiple (no limitations) locations, providers, and contacts to a note
- "Find a Provider,” "Find a Contact," and “Find a Location” boxes will pop up
- Users can search names and then click the desired provider, contact or location
- Once the note is saved, the activity will appear in each entities' activity note section so users do not have to repeat efforts
- Enter description of activity
- There is a section for free text to enter the activity description and any relevant notes attributed to the action
- There is no text limit for this section
- Adding resolution follow up
- Select the "Needs Follow Up" checkbox by clicking the square at the bottom left of the activity note screen
- Clicking the checkbox will prompt a green check mark to appear in the box. It also prompts a due date box to appear
- Click the calendar icon to the right of the "Due Date" box
- A calendar will appear and users can then select any resolution due date they wish for that activity
- Users can not select dates that have already passed
- Click the "Save" button or "Cancel" to close out the activity note screen
- Once saved, the activity note will appear chronologically in the activity note screen
- The activity note will not appear within the tab if the user selects cancel instead of save
Did this answer your question?
Thanks for the feedback
There was a problem submitting your feedback. Please try again later.
